How to draw a ladybug
There are a wide range of sorts of peculiar and great bugs on the planet, and these animals can come in each shape, size, and variety possible. The ladybug is no special case and is perhaps the most particular and outwardly striking bug you can find. These little critters might be little, but, they sneak up all of a sudden about strong varieties and intriguing examples. This has made them famous with specialists and toward the finish of this aide, you will go along with them in commending this bug. This bit-by-bit guide on the most proficient method to attract a ladybug in only 8 stages will tell you the best way to draw this wonderful bug without any problem.
Stage 1:
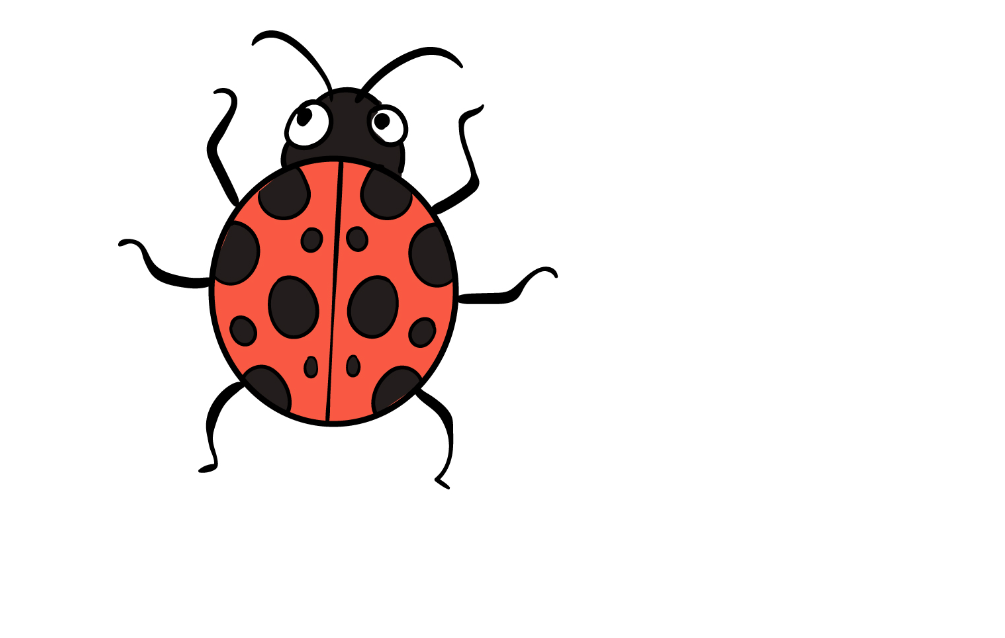
Ladybugs have little, round bodies, so we’ll begin with an oval in this aide on the most proficient method to draw a ladybug. To begin, essentially draw an enormous, adjusted oval like the one in our reference picture. We’ll add it in the subsequent stages, so how about we proceed?
Stage 2:
This piece of your ladybug drawing will be extremely simple! To show the division of the wings on the ladybug’s back, you can just define a boundary in the focal point of the oval body. At the point when you do this, attempt to keep the line as near the focal point of the oval as could be expected. Drawing for Kids
Stage 3:
As we referenced previously, one of the ladybug’s most unmistakable highlights is the dark spots on its back. No aid on the most proficient method to draw a ladybug would be finished without that element, so we should attract them to this step! The focus on one or the other side of the split on the back is entirely balanced, so attempt to remember that as you draw. As you can find in the reference picture, a portion of the dabs will be small while others will be bigger. Your advertisements don’t need to be indistinguishable from our own and you can continuously make your own varieties! Notwithstanding, assuming that you adjust it with your own plan, make certain to remember the note about evenness.
Stage 4:
In this step, we will draw a head for your ladybug drawing. This head configuration is very easy to make, as it is shaped by an adjusted line at the highest point of the round body. Then, you can draw two huge, bulbous eyes put on this head. When the head is finished, how about we continue toward stage 5?
Stage 5:
The eyes look somewhat dormant right now, so we’ll add more detail by adding a few students in this step of our aide on the most proficient method to draw a ladybug. This is very straightforward since all you want are two focuses inside the eyes that you attracted in the past step. You might reposition them assuming you believe that your ladybug should confront various headings. At last, you can draw your ladybug’s two radio wires on the highest point of its head, standing out between its eyes.
Stage 6:
Like all bugs, the ladybug has six legs and presently we will draw the initial three. The legs are shaped by extremely bended lines. Every leg has a somewhat unique point contingent upon the situation on the body, and our reference picture will assist you with getting these points looking right.
Stage 7:
Before we continue toward stage 8 of our aid on the most proficient method to draw a ladybug, we have only a couple of additional subtleties to add! The central thing is to add the excess three legs. These will be identical representations of the ones in the past step, so it ought to be quite simple for you. Whenever you’ve drawn these legs, you ought to go ahead and integrate any extra legs. Subtleties you would like for this photograph! A decent choice to constantly consider is a foundation, as this can provide your drawing with a more noteworthy feeling of spot. How might you complete this picture prior to continuing on toward shading.
also read: How to draw a ladybug